
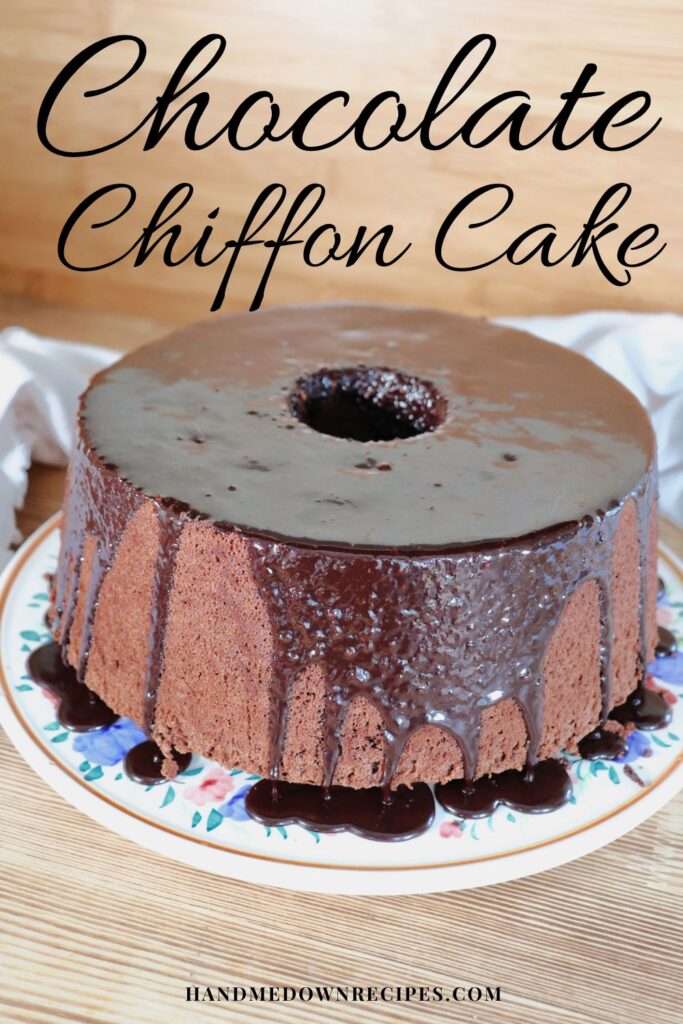
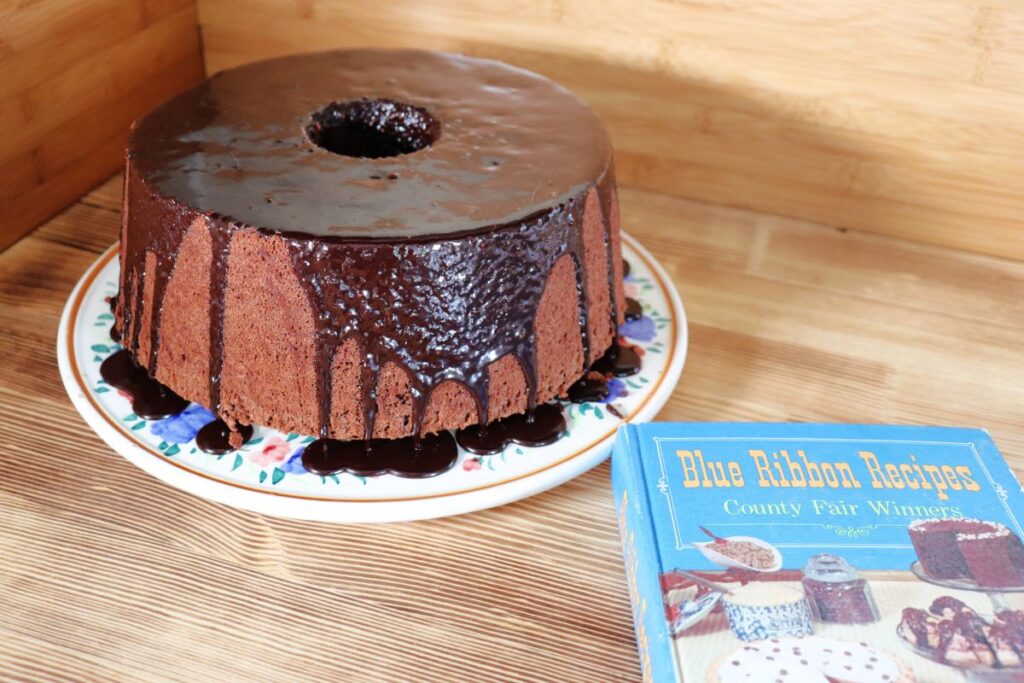
Fluffy, light, and perfectly sweet chocolate chiffon cake is just the dessert you need for a simple treat sure to please!
Like most chiffon cake recipes, this uses up a bunch of eggs and while it takes a while to cook and cool – it’s mostly hands-off meaning you can attend to other things while dessert is getting ready.
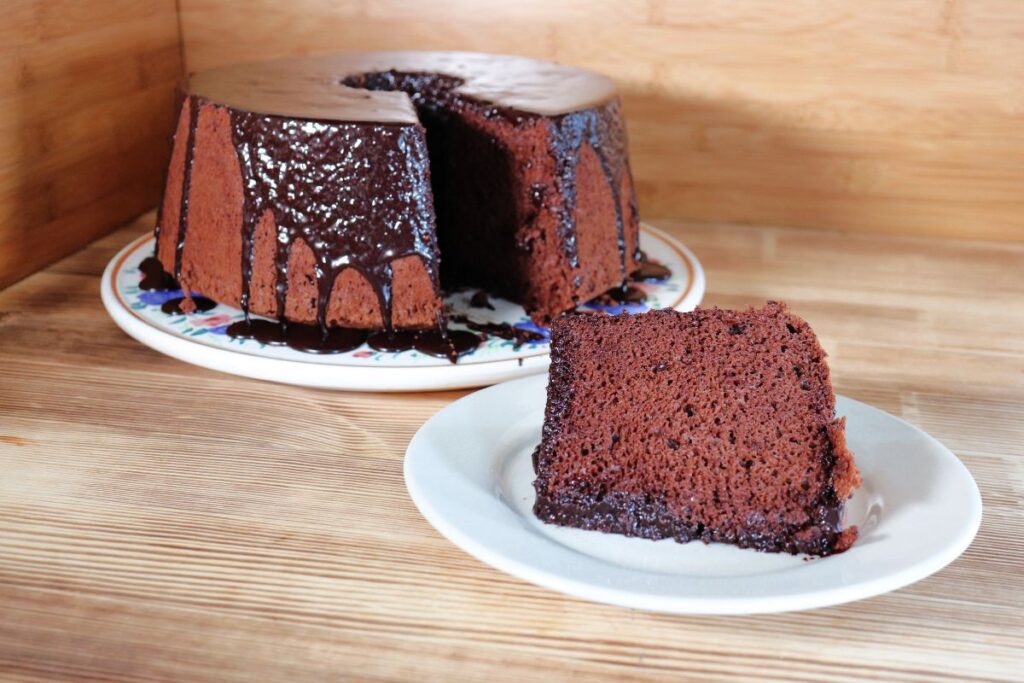
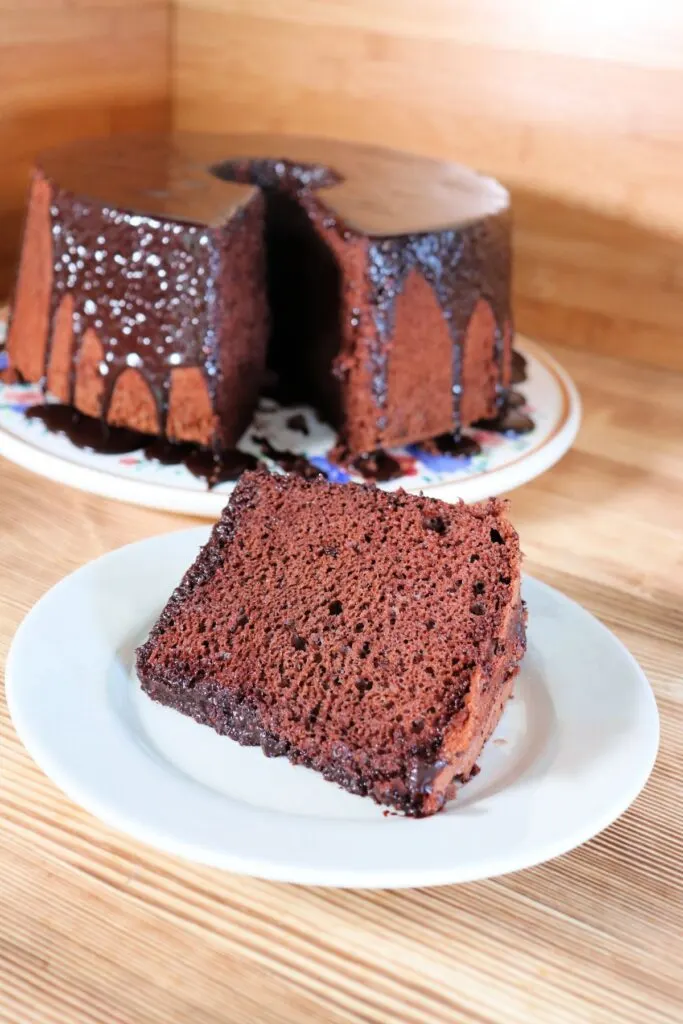
A light chocolate cake, this is the ideal recipe for simple desserts that can easily be dressed up in a number of different ways to keep it easy, delicious, and even beautiful.

Simple Ingredients
There’s nothing fancy here, do use the best ingredients you can find to make sure everything stays delicate and delicious. Your pantry staples are all you need but here are a few notes about some of the ingredients to keep in mind.
Eggs
You will need 8 whole eggs for this recipe. They need to be separated but you will use all 8 eggs in their entirety.
Cocoa Powder
Use whatever you have in the pantry. I went with the Burgundy Cocoa Powder from King Arthur but any that you have on hand will work delightfully.

Fat Choices
The original vintage recipe was written and suggested using vegetable oil. I have no doubt that would work but as is my general way, I prefer butter and used melted butter instead. You could likely use any oil, like olive or melted coconut oil, if desired. Melted margarine would also work.
Special Equipment
Generally, I think most anything can be worked around in terms of equipment but for this chocolate chiffon cake recipe, there are a couple of things that will make it easier.
Baking Pan
A tube or angel food cake pan is necessary. There’s no other way to make this and have it stay high. Please don’t try to bake this in something else and expect the same results.

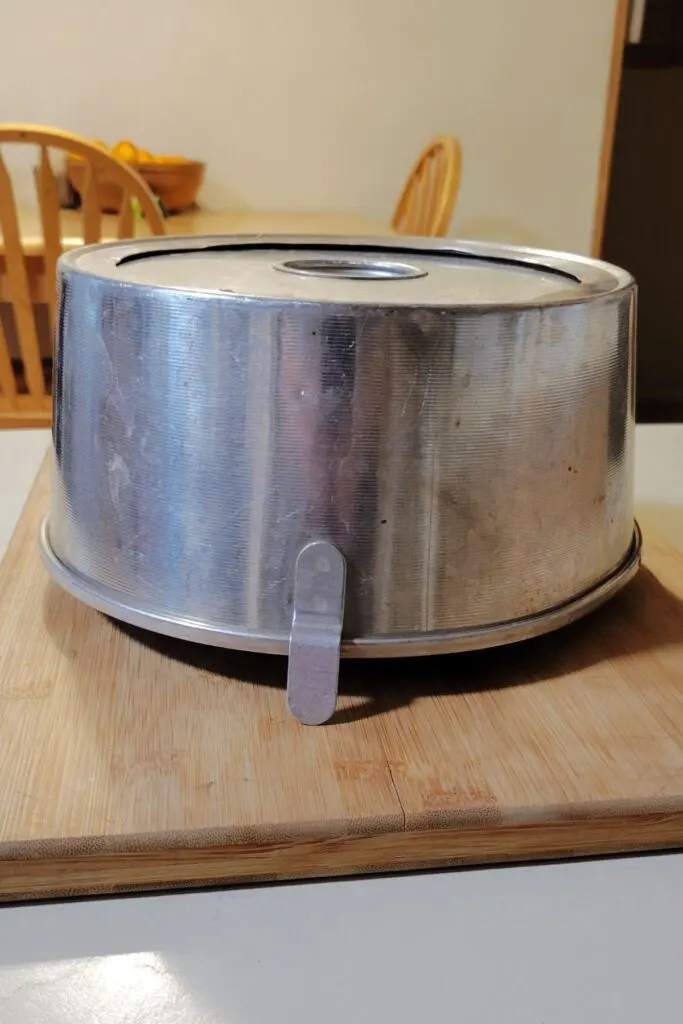
If you have an older pan that doesn’t have the feet, you will need to turn the cake pan over onto a bottle of some kind. An old wine bottle or glass pop bottle of some kind will work just perfectly.
The newer pans tend to have feet that will allow you to invert the pan easily while it cools.
Mixer
You can absolutely whisk eggs whites to the necessary stiff peak stage without a stand mixer but be prepared for an absolute arm work out when you grab your whisk.
I use a stand-mixer, it’s quick and easy but not strictly required.
Why Cool Upside Down?
Cooling a chiffon cake upside down, prevents it from falling under the weight of gravity. Don’t skip this step as it will likey not turn out as expected.
No, it won’t slide out of your pan, because you didn’t grease your pan first, the cake will stick to the sides and bottom of your tube pan.
Do cool for at least one hour upside down before removing from the pan.
To Glaze or Frost?
The recipe includes an optional chocolate glaze for you to use, if desired.
You could substitute a vanilla or spice glaze instead. Choose whatever you prefer, it’ll be great.

You could also frost the entire cake with whatever you prefer.
Skipping the frosting or glaze, is also a valid option. See options for serving if this is the route you want to go.
How to Serve
If you’ve glazed or frosted the cake, keep it simple and serve with tea, coffeee, or other favorite beverages.
A simple dusting of powdered sugar and some fresh berries on each slice is quite wonderful.
Serve slices with whipped cream or ice cream and a drizzle of fudge for something a bit for indulgent.

How to Store
Keep any leftover cake in an airtight container where it should stay fresh for about 4 days.
For longer term storage, place the cake or slices into freezer bags or containers and freeze. Simply let slices thaw on the counter prior to serving.
Eat up any frozen cake within 3 months for best flavor.


Chocolate Chiffon Cake
Light and fluffy, this vintage cake recipe is sure to please with its delicate texture and chocolate flavor
Ingredients
Chocolate Chiffon Cake
- 8 Eggs, separated
- 1/2 Cup Cocoa Powder
- 3/4 Cup Boiling Water
- 1 3/4 Cup Unbleached, All-Purpose Flour
- 1 3/4 Cup Granulated Sugar
- 4 teaspoons Baking Powder
- 1/2 Cup Salted Butter, melted
- 1 teaspoon Vanilla Extract
- 1/2 teaspoon Cream of Tartar
Chocolate Glaze
- 6 Tablespoons Cocoa Powder
- 1/3 Cup Salted Butter
- 1 1/2 Cups Powdered Sugar
- 1 teaspoon Vanilla Extract
- 2 Tablespoons Milk
Instructions
Make the Cake
- Preheat oven to 325 degrees Fahrenheit.
- Have tube pan ready. Do NOT grease.
- In a small bowl, whisk together the cocoa powder and boiling water until smooth. Set aside to cool to room temperature.
- In a mixing bowl, whisk together the flour, sugar, and baking powder.
- Pour the egg yolks, melted butter, and vanilla extract into the dry ingredients and mix just until combined. It will be stiff and dry, that's okay.
- Add the cooled cocoa mixture and stir until combined.
- In a large bowl (or the bowl of stand mixer), combine the egg whites and cream of tartar. Beat until stiff peaks form.
- Pour the chocolate mixture over the egg whites and fold gently until completely combined.
- Pour the cake batter into the tube pan.
- Bake in the preheated oven for 55 minutes.
- Turn the oven temperature up to 350 degrees Fahrenheit, bake an additional ten minutes.
- Test the cake to make sure it's done by inserting a tester or thin knife - it should come out clean.
- Invert the pan to cool, either placing it on its feet or inverting over a bottle if there are no feet. Let cool at least one hour this way.
- Once cool, gently run a butter knife around the edges of the cake and pan to loosen. Push up the center to remove the outer pan.
- Run the butter knife around the tube center and underneat the base of the cake.
- It should come loose from the pan and turn the cake over onto a cake plate to finish cooling.
Make the Glaze
- In a small saucepan, combine the butter and cocoa. Whisk together until the butter is completely melted and a thin chocolate sauce is formed.
- Remove from heat.
- Add vanilla extract and powdered sugar. Stir and add 1 Tablespoon of Milk. Whisk until smooth adding more milk a little as time to keep a smooth, thin glaze.
- Pour the glaze over the cake, using an offset spatula or butter knife to force edge over the edges of the cake.